- Englishen
- Deutschde
- Svenskasv
- 中文 (Zhōngwén)zh
Welcome to Falkenstein – my new model railway world!
For many years, I hesitated to take down my old layout. The thought of starting over – with all its challenges in terms of space, time, money, and technology – kept holding me back.
But eventually, the urge for change won. The desire to create something new. And, truth be told, the control software for a fully automated digital operation had been sitting unused in a drawer for far too long …
Instead of designing the track plan myself, I discovered the well-thought-out and detailed plans by Guido Meise through a Märklin Facebook group. His layouts, guides, and helpful videos convinced me. I chose a concept that perfectly fit the available space – Falkenstein was born!
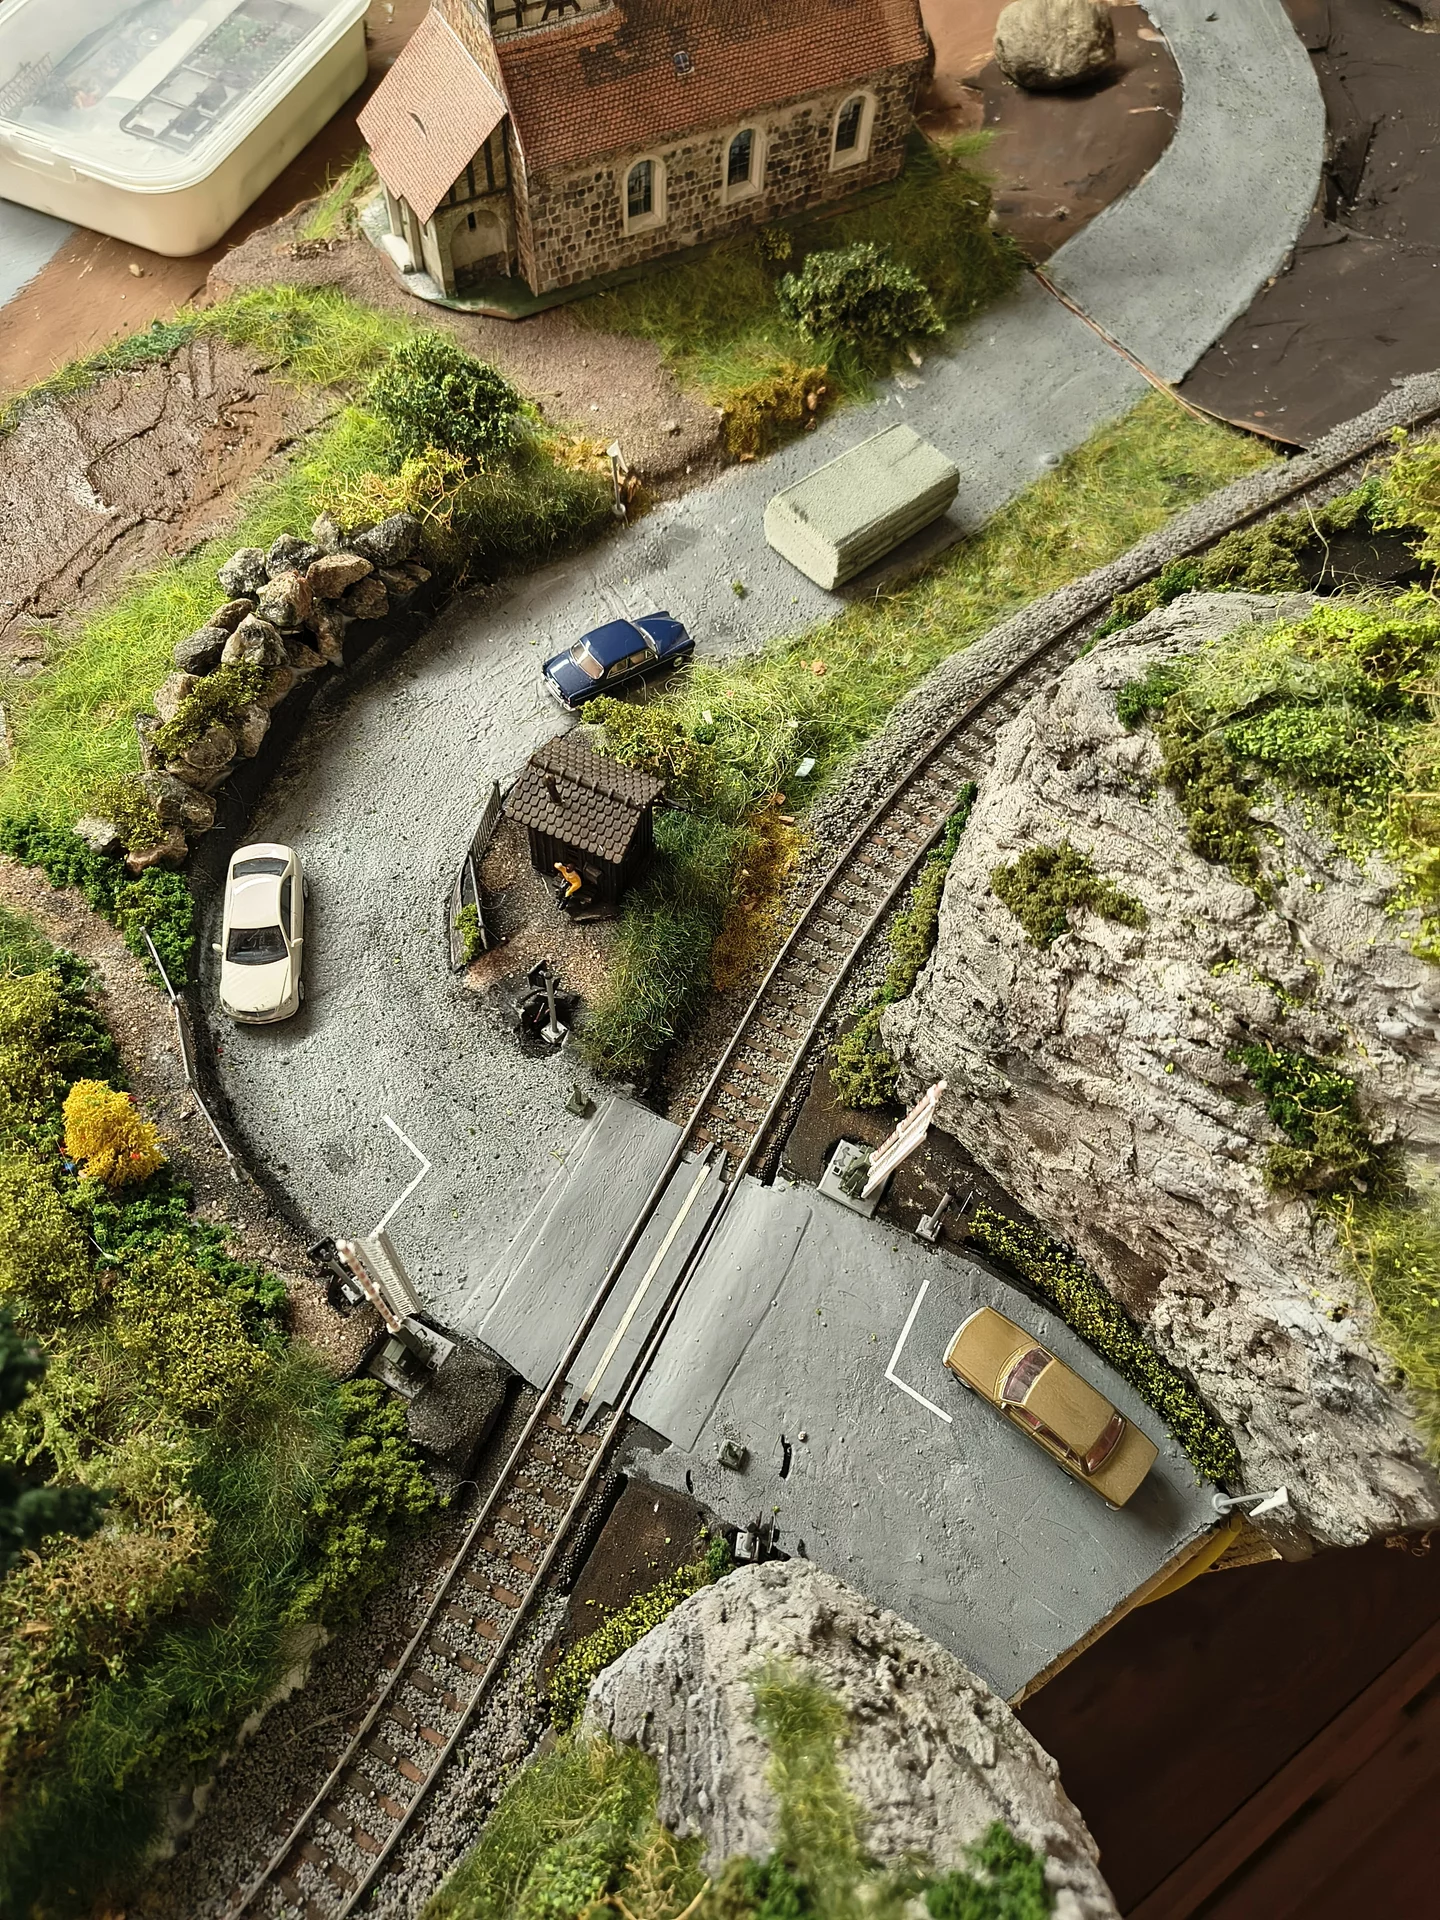
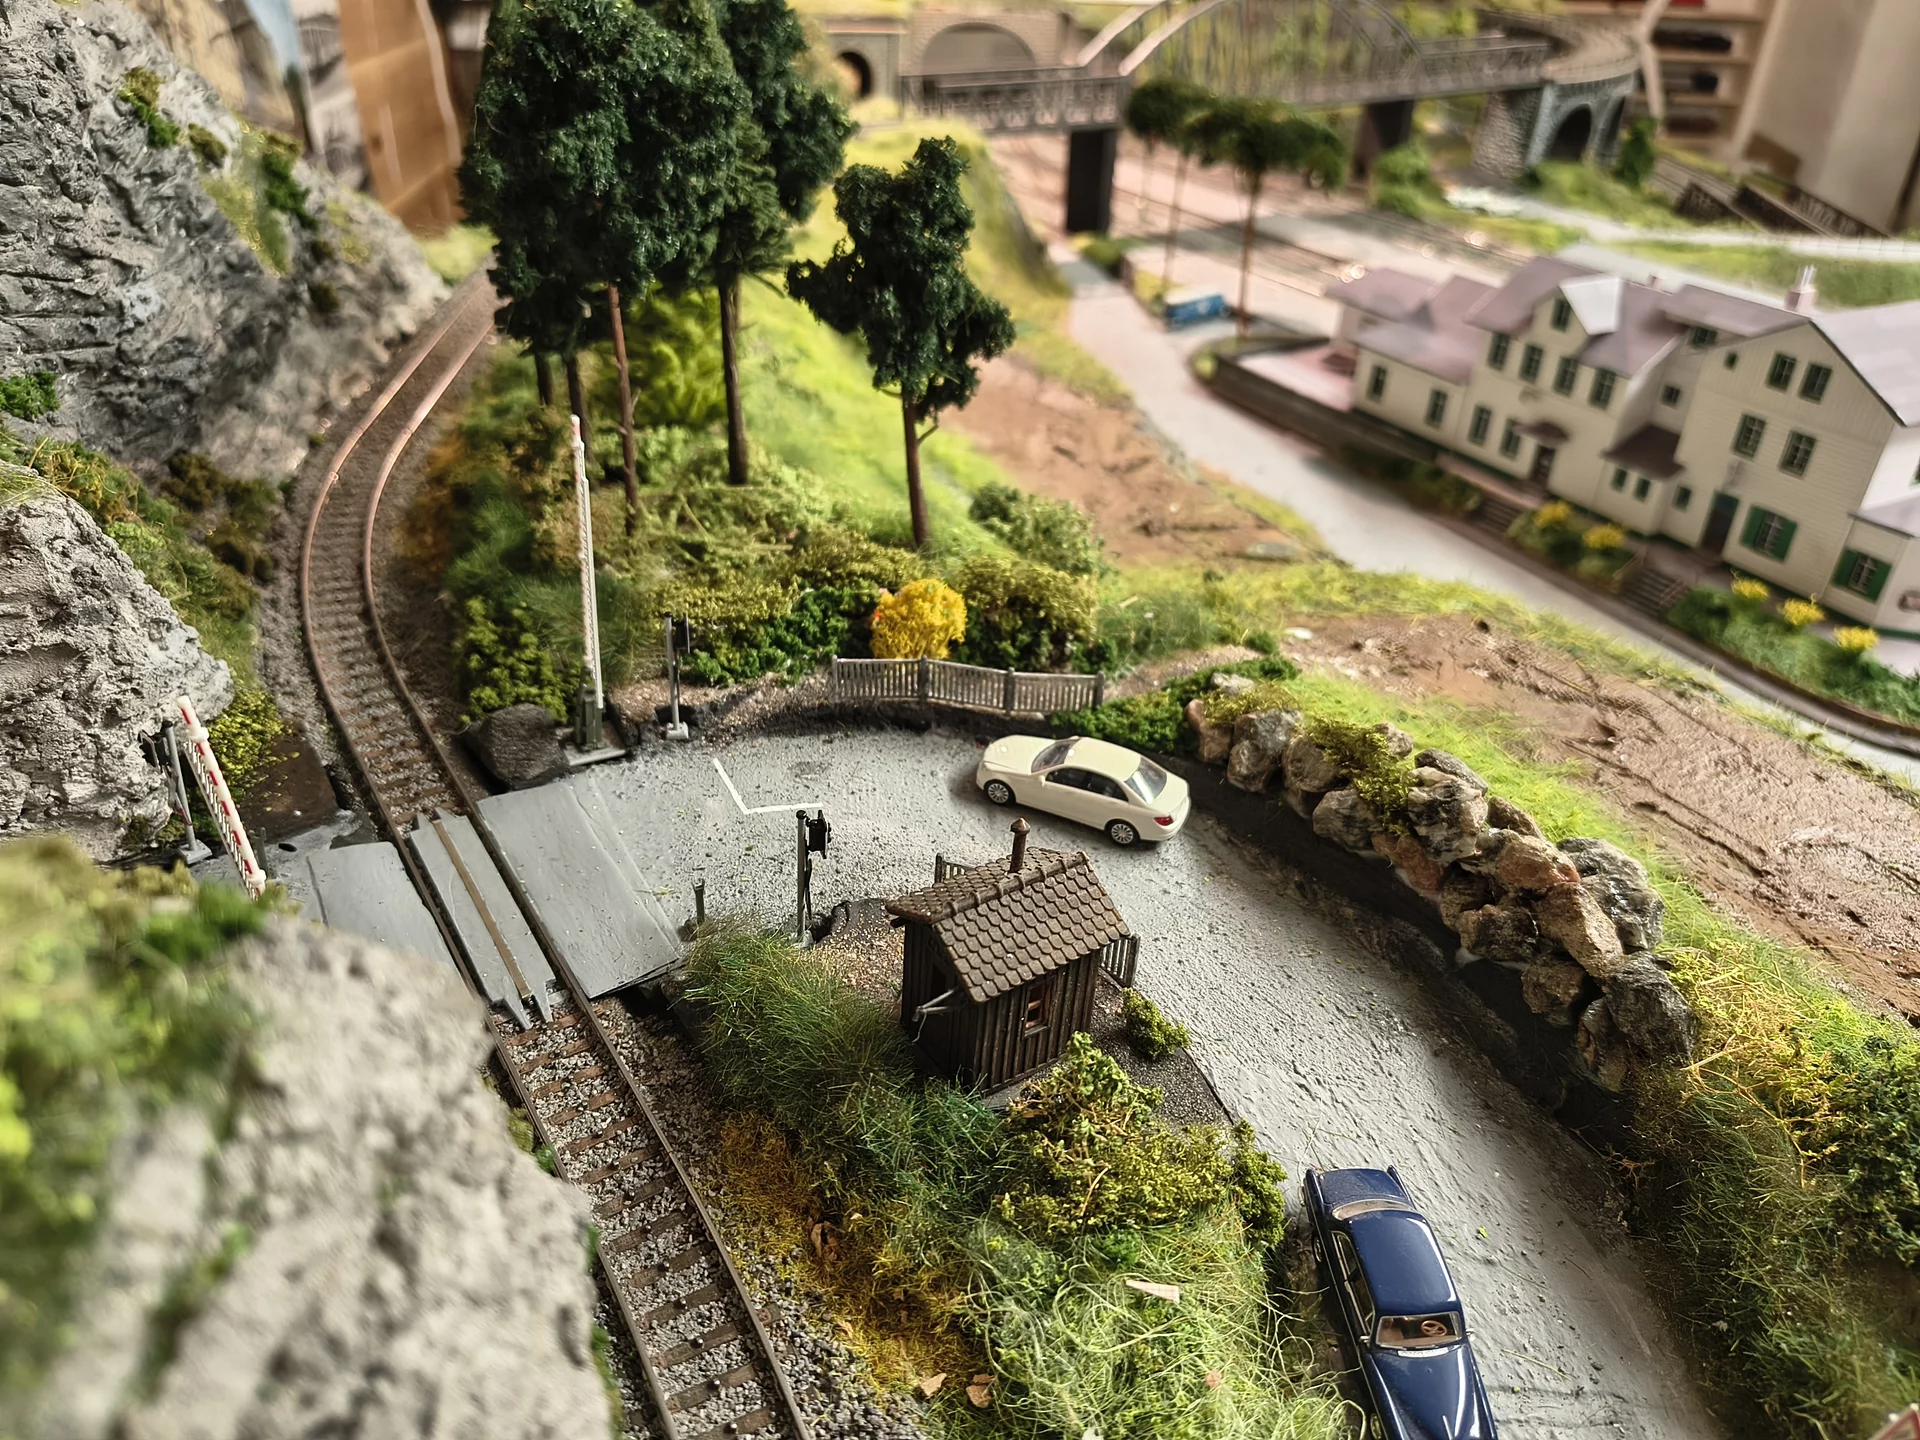
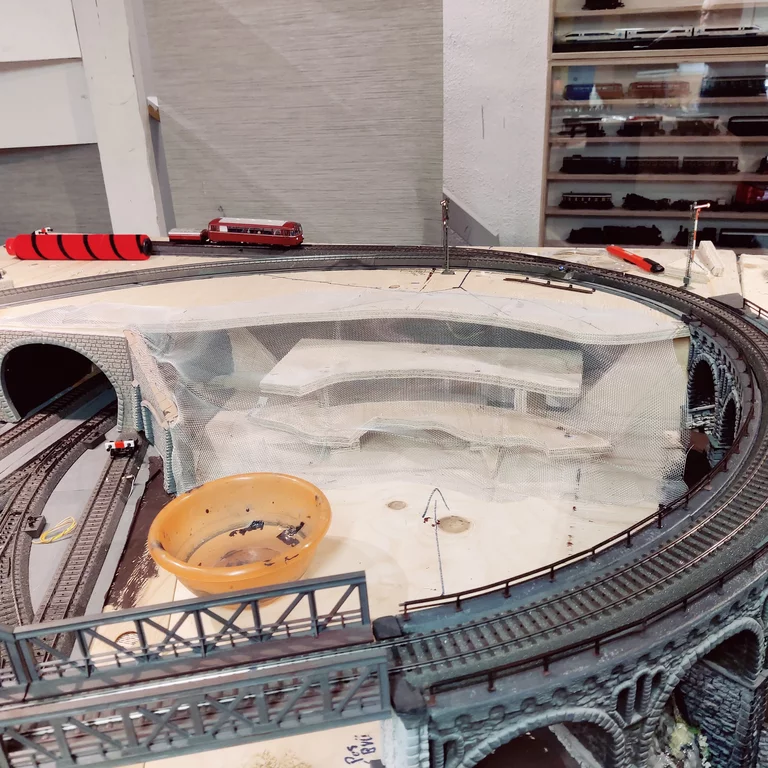
The layout features a scenic double-track main line, a six-track hidden yard, a station with a small engine facility, and a long branch line ending in a charming terminus with impressive bridges.
Sure, some curves are still tight – but it’s a big step up from the previous layout, and above all: it’s a real passion project.
On this site, I’ll document the build step by step: from dismantling the old layout to frame construction, track laying, wiring, software integration, early test runs, and finally scenic work.
I hope you enjoy following along!
After more than a decade of loyal service, my previous Märklin layout made way for the new "Falkenstein" project.
Since 2011, it had been my playground, testing ground, and creative retreat. The decision to dismantle it wasn’t easy—but it was the necessary first step toward something new.
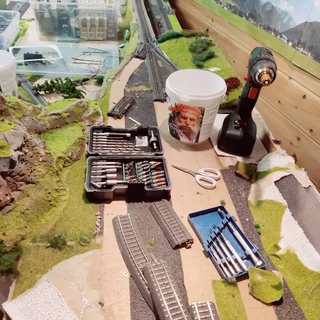
The disassembly was done with care: valuable Märklin C-tracks were gently removed, cleaned, and stored in an organized way—ready for their second act on a new stage.
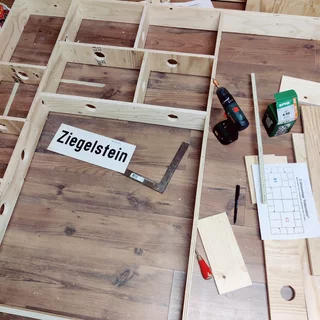
Built from durable multiplex wood, two precisely cut segments were assembled to support the entire layout.
All cable routing holes were pre-drilled, and access for maintenance and segment separation was already taken into account.
To keep the layout mobile, swivel castors are the ideal
solution.
A precise cut of every single part is essential for an exact
fit – as clearly demonstrated in one of the many videos on
Guido
Meise’s YouTube channel (in German only).
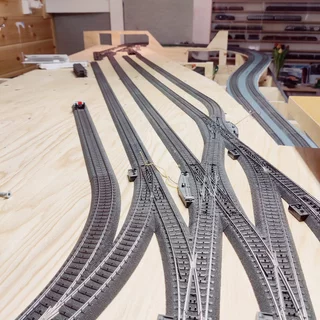
The completed base frame is temporarily covered with planed plywood sheets (10 mm).
The Märklin C-track is temporarily laid on top of this, and its course is marked on the plywood sheets.
The hand jigsaw is used to precisely cut the marked track sections to size. These then form the so-called track boards, which are finally fixed to the frame, ensuring that the height specifications specified in the track plan are strictly adhered to.
Following the "Falkenstein" track plan, the Märklin C-track is now completely laid on all three levels of the layout.
Screwing is omitted. A plastic grass mat is placed beneath the laid tracks, providing firm support and also soundproofing during later operation.
Reliable traction power is provided by multiple track feeds, which are connected to the Märklin CS 3 digital control center via a distributor.
The Adventure of Automation – A Challenge
My previous layout was already fully digital, so every locomotive had its own decoder and could run independently on the same track power. But control still relied on manual throttles—and on the operator’s quick reactions to avoid crashes.
Now, with PC-controlled automation, things change: trains can follow a programmed schedule, running smoothly, on time, and without collisions—just like the real railway.
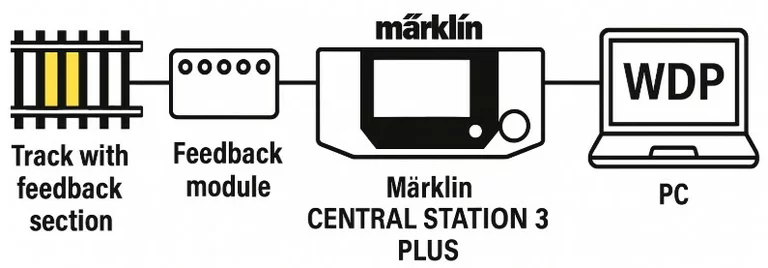
To make this work, the layout needs more than just digital locomotives. Tracks must be prepared with feedback contacts that tell the computer exactly where a train is. On my Märklin system this means isolating a short rail section and wiring it to a feedback module.
The modules are then connected to the Central Station CS 3+, where the track plan is displayed. From there, the software can monitor every train and control their movements automatically.
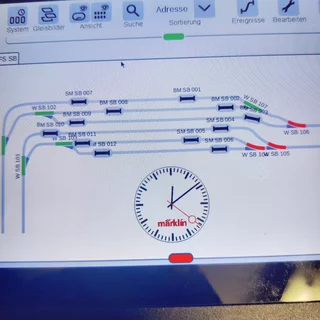
The Märklin Central Station 3 Plus (CS3+) already offers some basic functions for automated train operation. These include setting up simple routes, controlling switches and signals, and—using feedback modules—enabling semi-automatic operation. For small to medium layouts this is often sufficient to create a varied train service.
However, those who want to implement more complex sequences, precise timetables, or comprehensive automation will sooner or later encounter the limits of the CS3+. This is where external programs such as Win-Digipet come into play: they provide extensive automation features, from detailed timetables to flexible route logic and real-time train tracking. Additional modules and visualisation tools can also be integrated more easily.
In the track diagram of the CS3+, the symbols representing the feedback contacts light up in yellow whenever a train passes through the isolated track sections. This provides a simple visual indication of train movements even in hidden areas of the layout – such as tunnels or staging yards.
Advantages of CS3+:
Compact solution without an additional PC
Direct control “from one hand”
Beginner-friendly for basic functions
Advantages of external software (e.g. Win-Digipet):
Extended automation capabilities
Complex timetables and train sequences possible
Flexible adaptation to individual layout concepts
Comprehensive visualisation and evaluation
In short: The CS3+ is ideal for beginners and
for those who prefer straightforward direct control. External
software solutions, on the other hand, open up much broader
possibilities for fully automatic, detailed and realistic
operation.
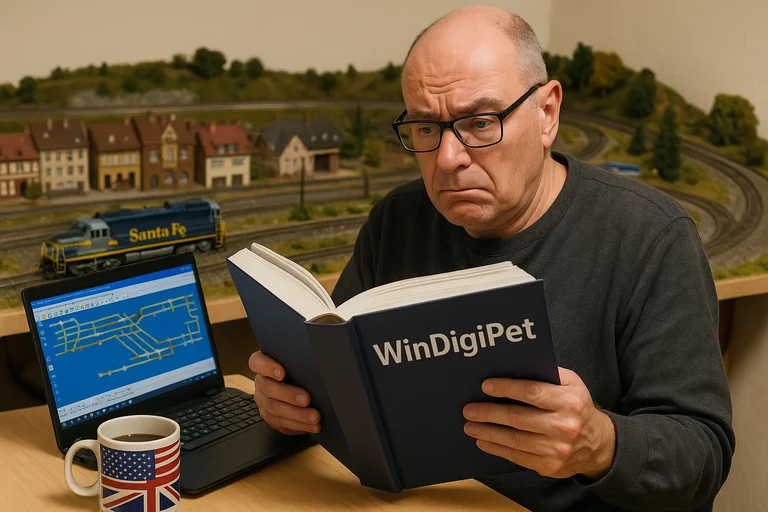
I decided to purchase the "WDP" software several years ago, but
only started implementing it with the new construction of my
layout after I entered early retirement. In the following
section, I'll share my experiences.
The software WinDigiPet (WDP) also provides a visual track diagram, but compared to the CS3+ it can display far more detailed operating information – such as vehicle names and dynamic vehicle moves.
Unpack, switch on, and start running – that’s how many model railway manufacturers like to advertise. It fits neatly into today’s plug-and-play world, where a simple swipe on a smartphone app often seems enough. In reality, though, even starter sets require more than the push of a button. And once digital technology entered the hobby more than 30 years ago, it became clear that things weren’t quite so simple. The ultimate challenge is the fully automated, computer-controlled operation.
For years I hesitated to “dive into it” – like many fellow hobbyists, I don’t have a strong technical or IT background and am more of an autodidact. As my former CEO once said: “Persistence and perseverance” – you need them both in your job and in life. And they are especially needed when it comes to setting up WinDigiPet (WDP).
The good news: even if you often sit alone in the basement with the challenge – and the proverbial 1,000-page manual, of course provided as a PDF – you are by no means truly on your own. Help is abundant: through countless online forums, for example on Facebook, and above all in the excellently moderated official WDP forum (unfortunately presently only in gothic...) The software’s authors have also created a manual that enables even beginners to work their way step by step into the adventure. With some perseverance, the first successes come faster than expected.
In the following chapters I will describe some of my experiences on my path – step by step – from the initial settings to a reliably running automatic operation.
My notes here are, of course, no substitute for the comprehensive WDP manual. But I hope they help to reduce the initial hesitation.
The basic requirements are straightforward: your locomotives are digitized with decoders, you own a digital control unit (e.g. Märklin CS3+), and you have a PC with WDP installed. For the control unit and the software to control your trains automatically, the layout must be prepared so that the program always “knows” where each locomotive or train is located.
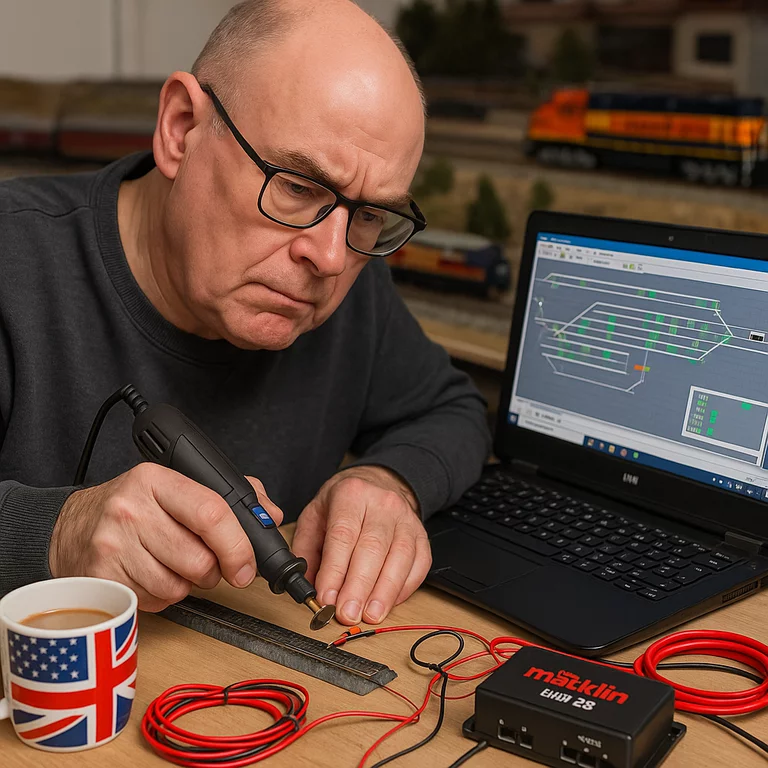
I learned how to set up these feedback sections mainly from video tutorials and from the documentation I received with my track plan from Guido Meise (MMC),unfortunately only in gothic. Ask me for help... .My advice: work carefully, don’t rush – and better watch the video once more. Then it will work.
The rule of thumb: better more sections than too few, so that the program can later provide more precise operating data. With a cutting tool (e.g. Dremel), one rail is isolated at defined intervals. Don’t worry: Märklin AC locomotives run smoothly across these gaps. Each section is then connected by wire to a feedback module, which in turn is linked to the CS3+ via a bus cable. The CS3+ itself communicates via cable or Wi-Fi with the PC running WDP.
It is also essential to measure each feedback section precisely and enter these values into WDP. This is one of several prerequisites for achieving realistic operation later on – for example, braking and stopping exactly at platforms and signals. If you use a track planning program (such as WinTrack), this is no problem at all, since the exact measurements are already included.
Of course, this requires some manual work and also an investment in feedback modules (e.g. Märklin Link 88). But the instructions are clear, and if you work carefully when cutting and wiring, you can be confident: it will work!
...it's not rocket science, it's actually fun, I think. But
yes, every software can be confusing at first – especially one
as powerful as WDP. Ideally, you start by creating a track
layout – and how that works is explained in detail in the
manual.
On a drawing board, you place individual elements that you
select from a large symbol database — regular tracks, switches,
signals, buttons, etc.
Here's a short video to get you started:
When I began thinking about building a new, PC-controlled model railway layout, I was inspired—among other things—by a YouTube video. It impressively shows, in the truest sense of the word “transparent,” the possibilities of fully automated train operation.
In this video, you can see a three-dimensional replica
of my layout “Falkenstein”, featuring a simulation of
seven trains running automatically at the same
time—just as I plan to make it work in my model
railway cellar!
Please ignore the "gothic" sound of the initial introduction...
And what can I say? For months I was haunted by doubts about whether I could ever manage it—but with persistence, patience, and countless hours spent in my basement, I succeeded!
The first test runs proved: It works! Even before the landscape construction has begun, eight trains are already running simultaneously, completely automatic and collision-free, without any manual intervention.
Of course, there’s still much to do: an automated
shunting routine at the station, a virtual
time-based timetable, and an automatic level
crossing on the branch line.
And the program-controlled lighting of the
model houses is also on my to-do list—but the
foundation for fully automated train operation
has been laid!
to be cont'd soon...
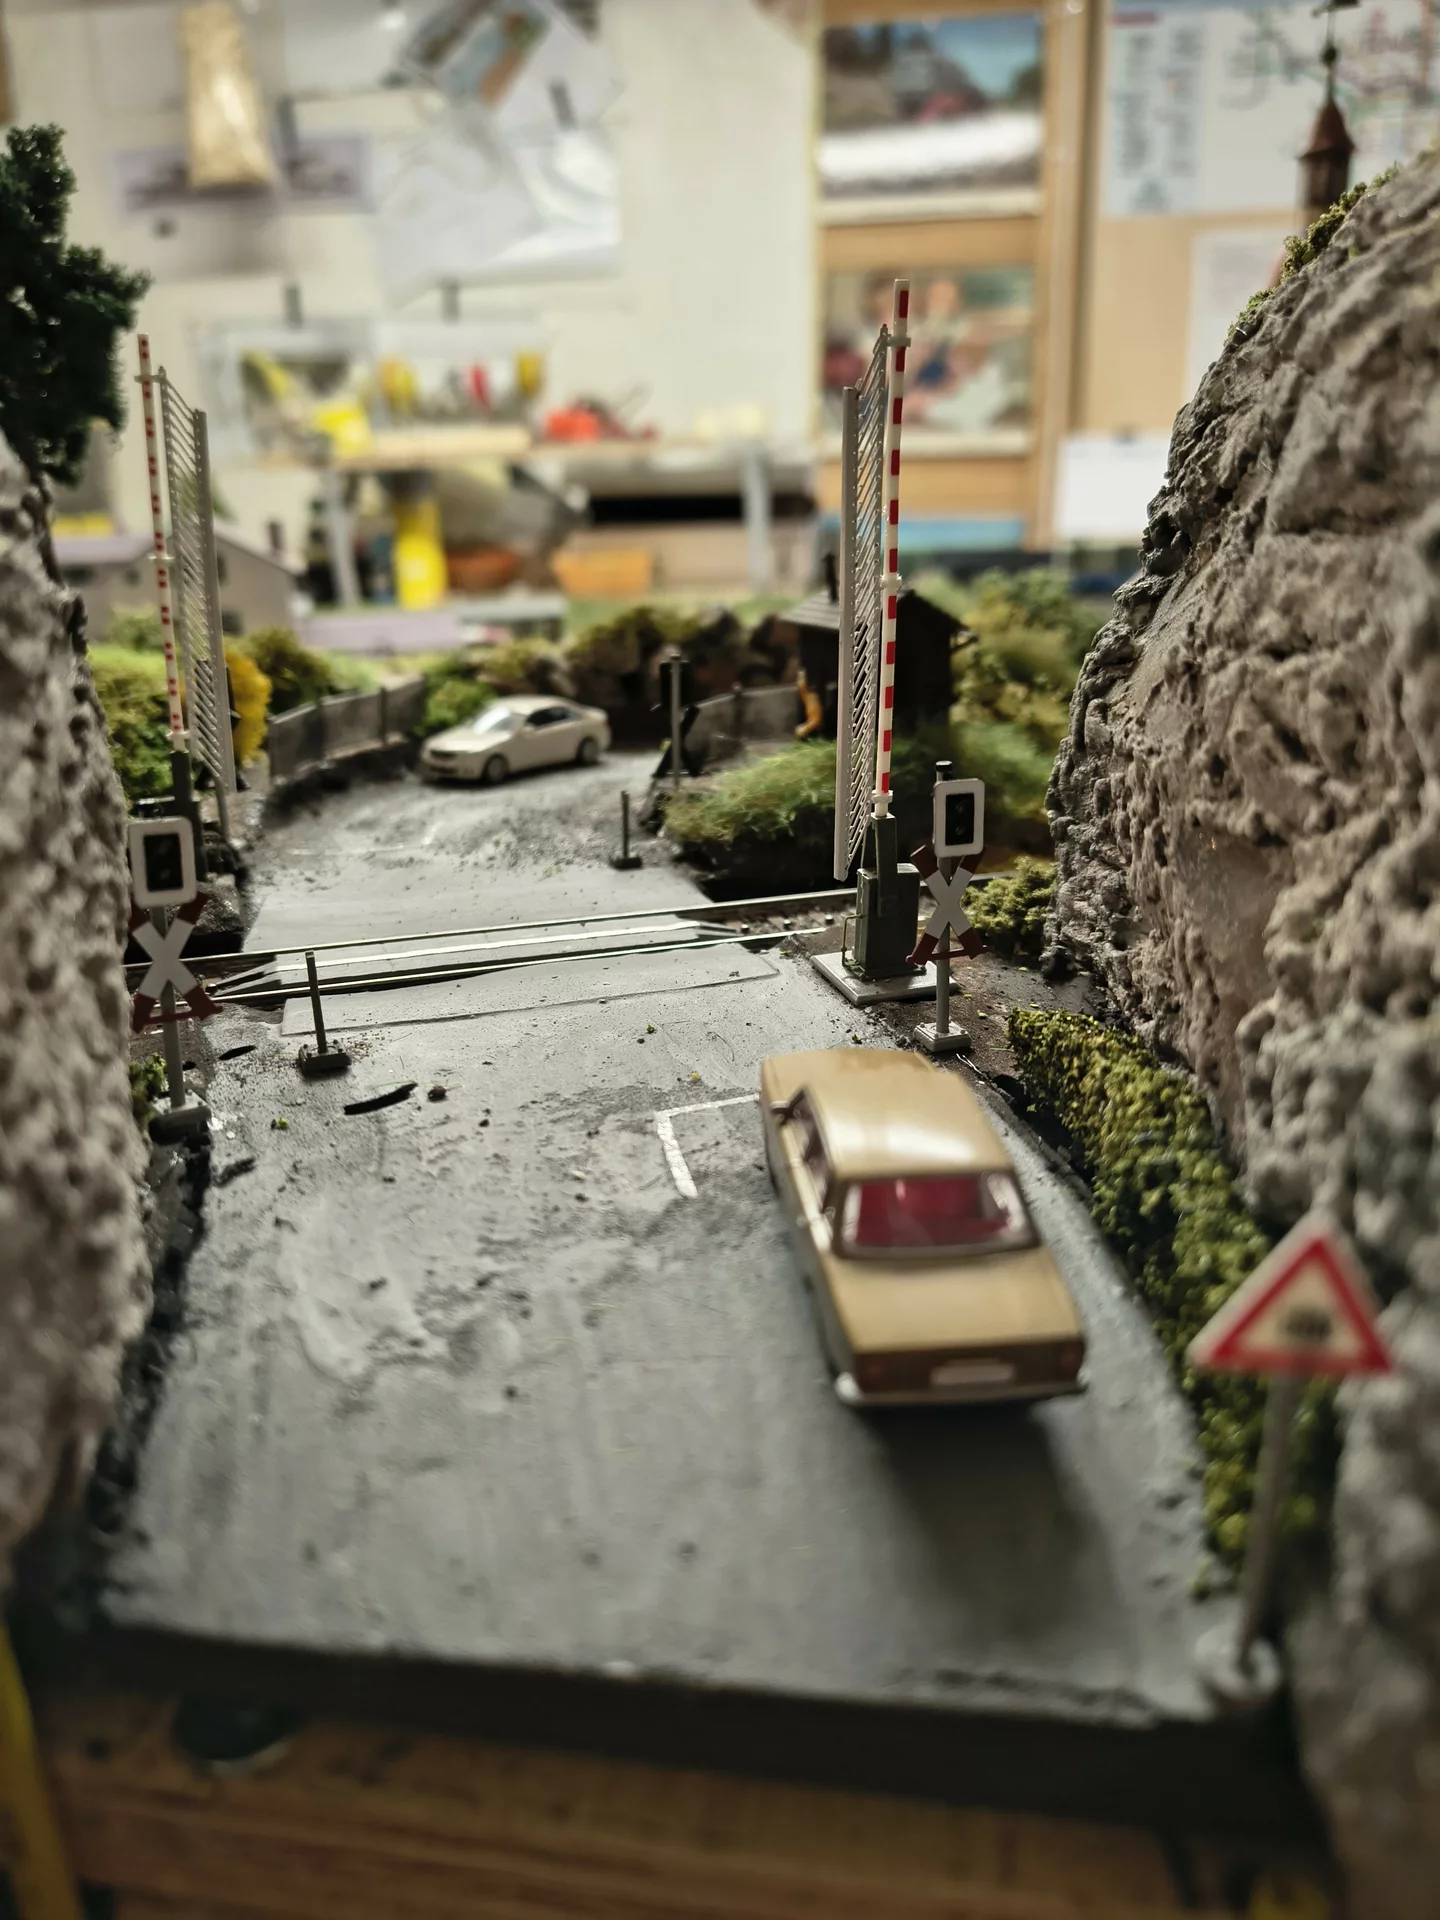
One of the scenes I particularly enjoy recreating on my model
railway is the automatic closing and opening of a level
crossing barrier, complete with flashing warning lights.
For this, I use Viessmann barriers, which feature a realistic
lattice skirt that unfolds as the barrier lowers, effectively
blocking the road both visually and physically.
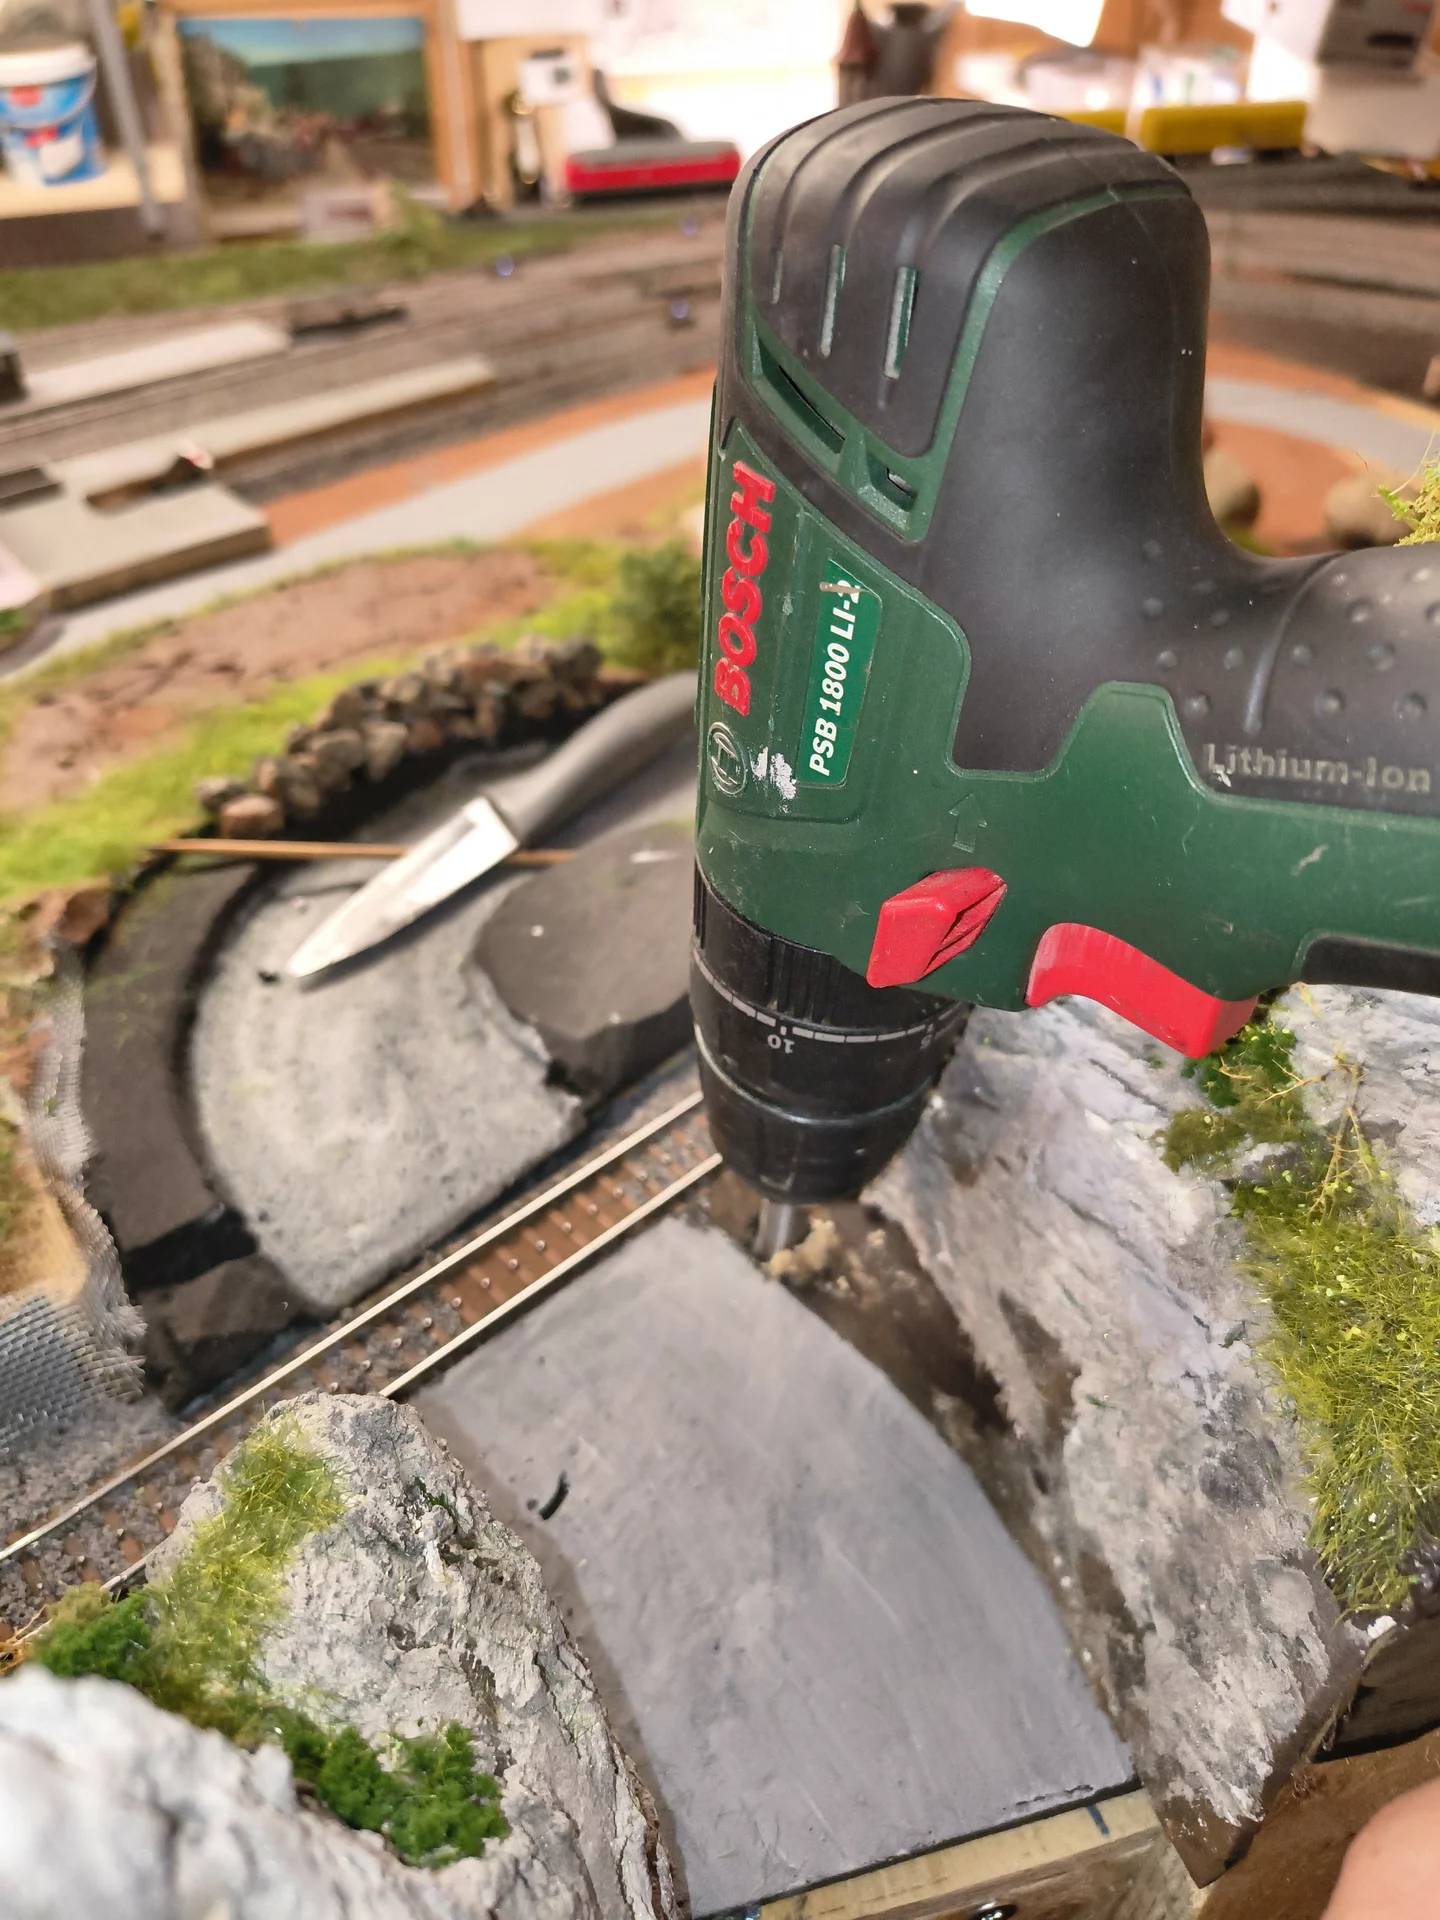
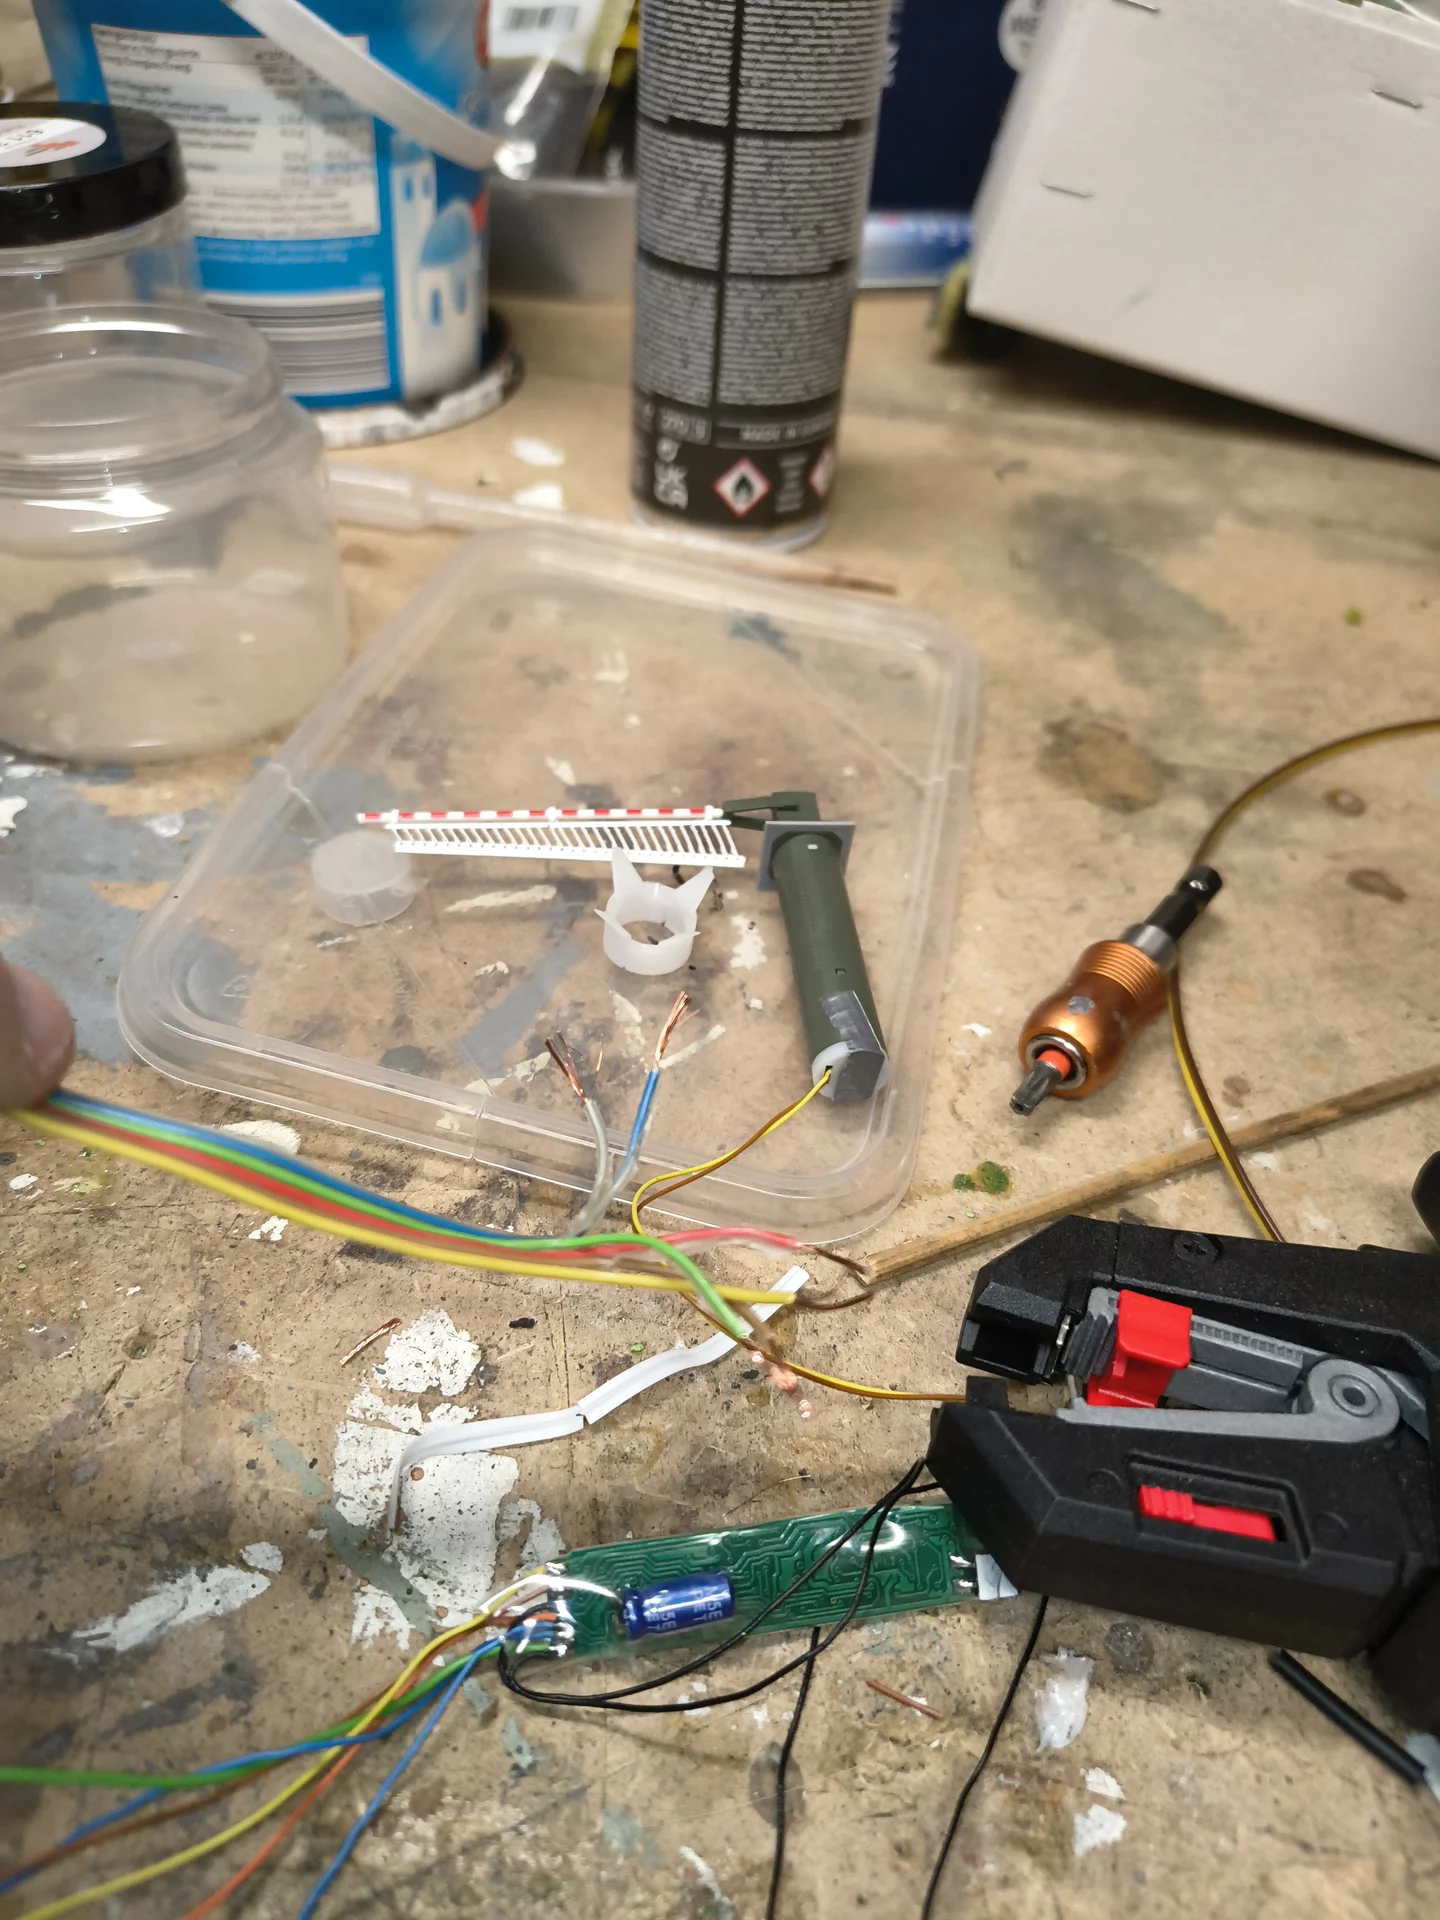
Before installation, I test both the barrier and the lights. Holes are drilled in the baseboard so that the drive unit beneath does not collide with passing trains.
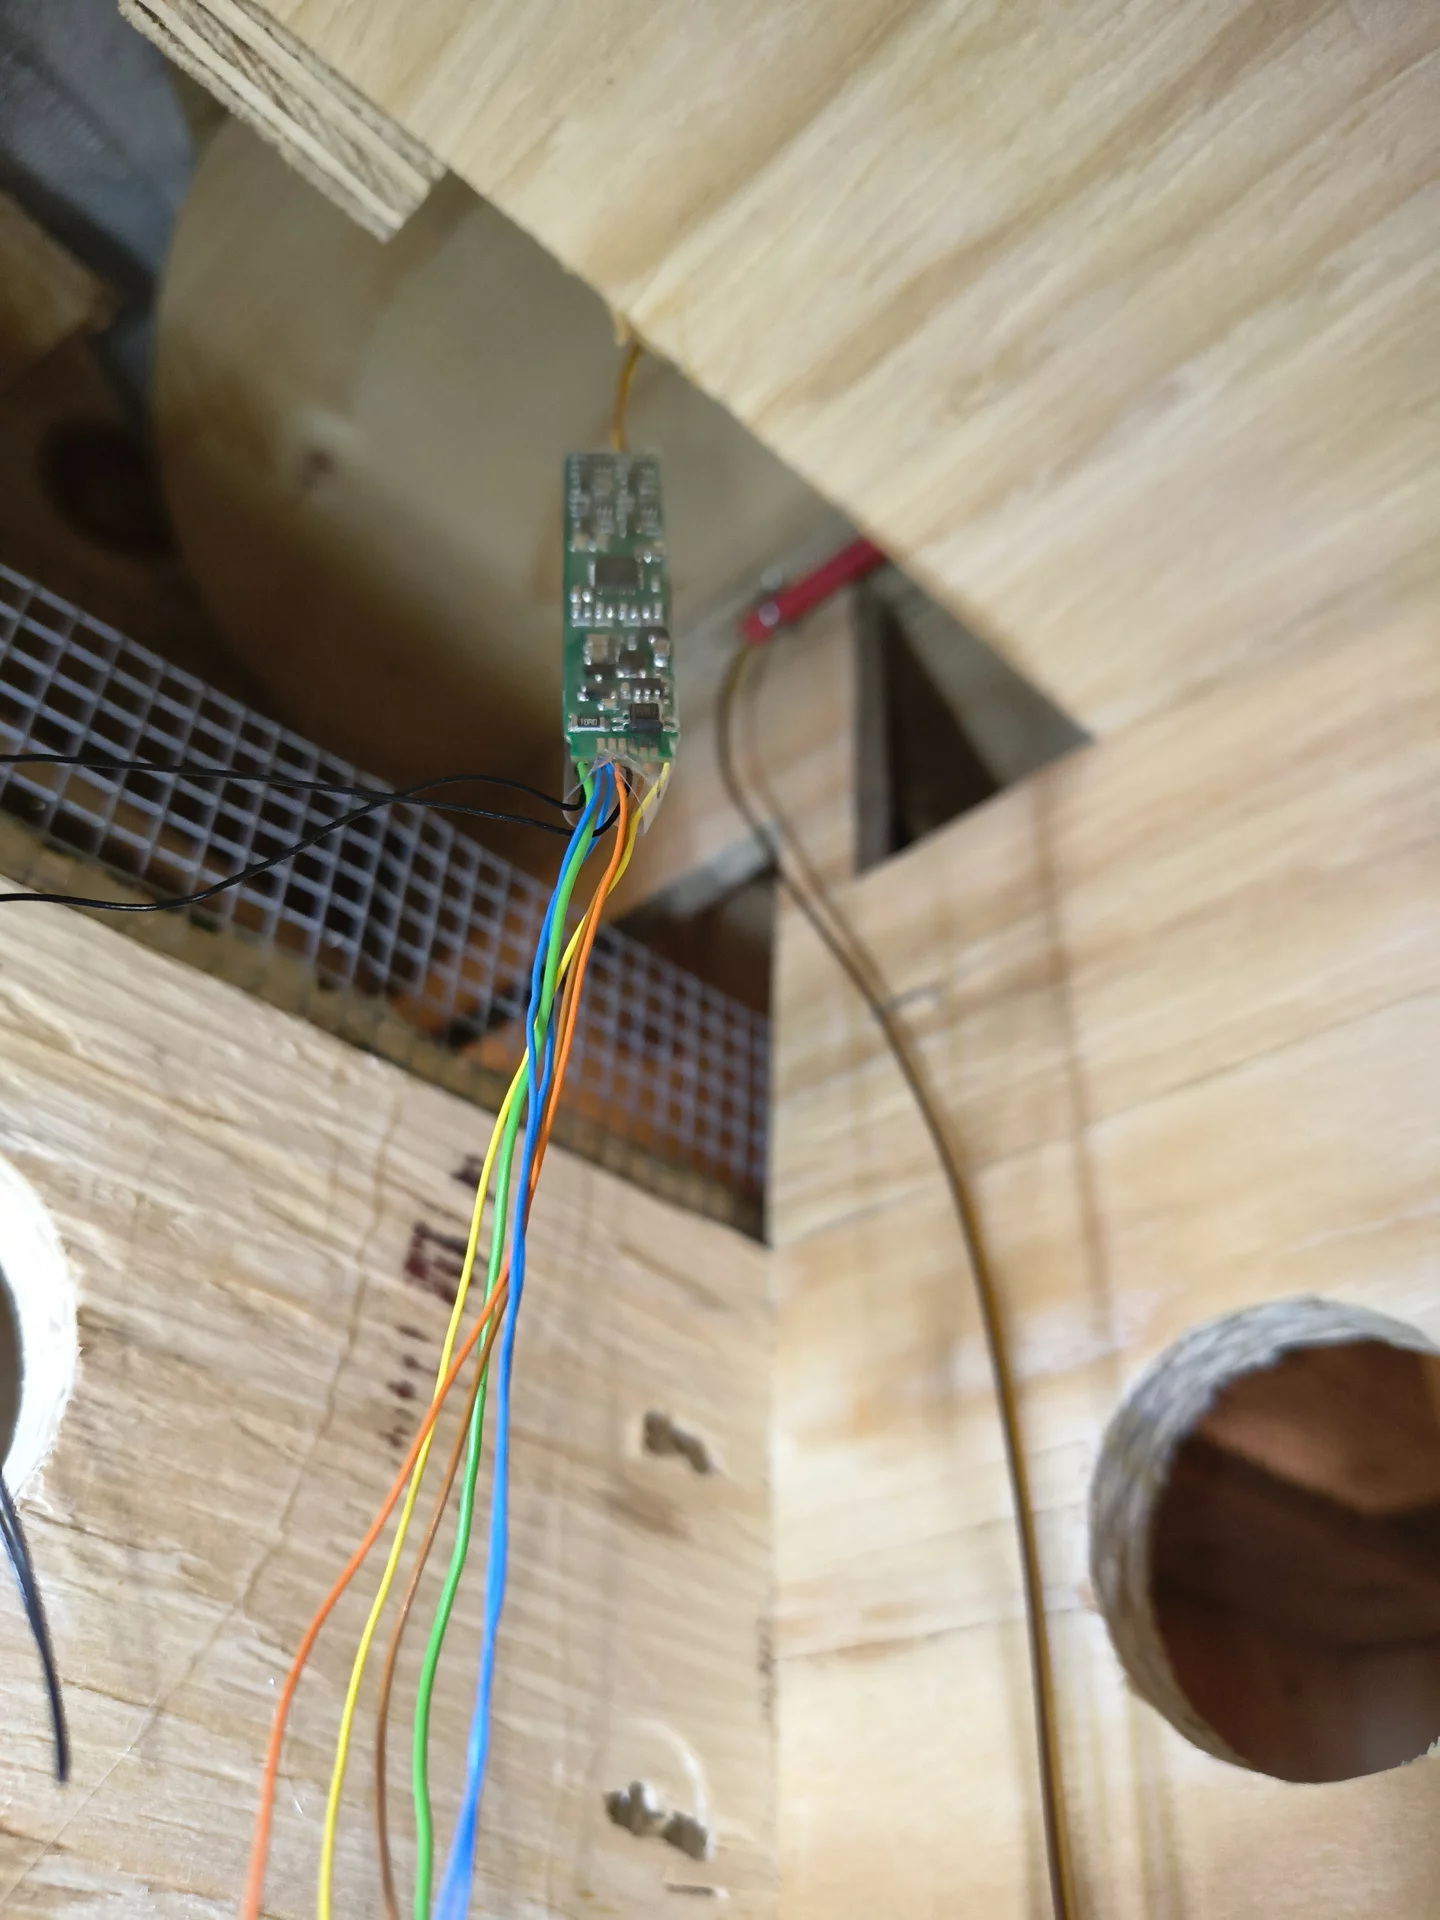
Electrical wiring is easiest with the color manual available on Viessmann’s website, since the numerous wires are easy to mix up. The small built-in decoder is fixed under the layout and connected to the digital bus via the Märklin Central Station (CS3). Configuration follows in both CS3 and WinDigiPet (WDP).
Automating the process – triggering the barrier through the
train’s motion – requires some understanding of WDP logic.
After a few trials and helpful advice from other users, it
finally worked flawlessly:
The barrier lowers, the red lights flash, cars stop – and the
train passes safely before everything returns to normal.
What would a railway be without scenery? Boring? Not necessarily. Many “play operators” are happy with just track and trains running – just as most of us once started with a beginner set on the living room floor. But let’s be honest: God did not first create the railway and then add the world around it. We do the opposite: first come the tracks, routes, sidings, and tunnels – and only then the landscape.
As in democracy, compromises are essential in model building. Space is limited, ideas are unlimited. In Falkenstein this means: as much train operation as possible within a believable setting. The work is demanding, but for me, crafting is pure joy.
The woodwork is finished, the tracks are in place. Now gaps are closed and the base prepared – with cardboard, wire mesh, and plaster. Plaster is excellent not only for shaping but also for creating rocks while still wet. Everything is primed with dark earth tones, stones glazed in shades of grey.
Meadows, bushes, forests, and roads must never look “too clean.” Nature is variety: colors, textures, leaves, wood, stones, small irregularities. That’s why I always repaint ready-made products – a forest in just one green shade would look artificial.
Step by step, Falkenstein’s landscape grows – with patience, attention to detail, and the aim of making the miniature world feel alive.
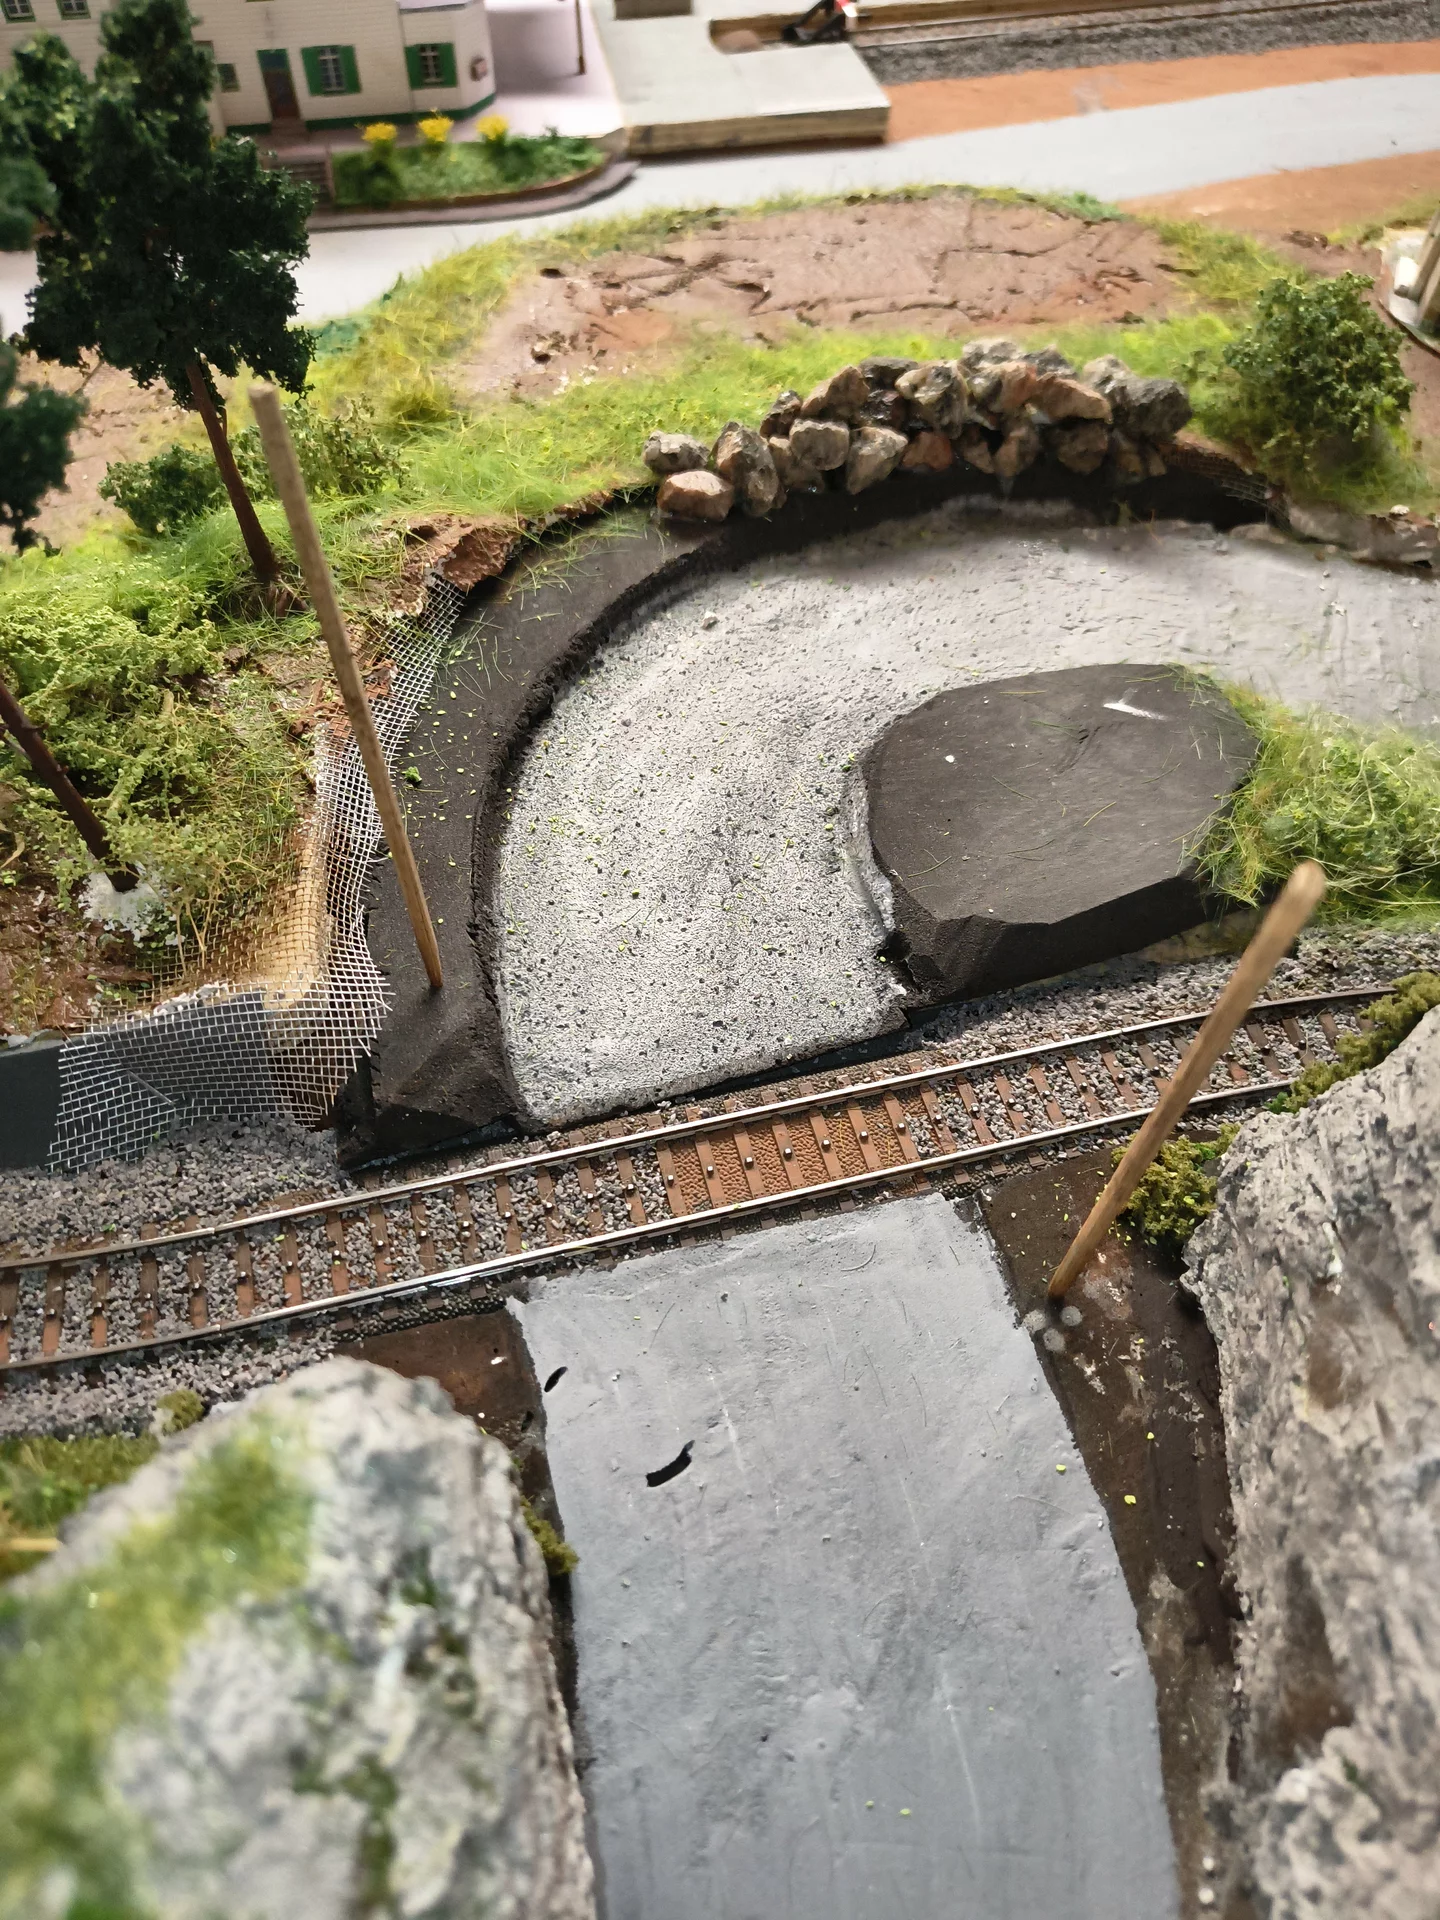
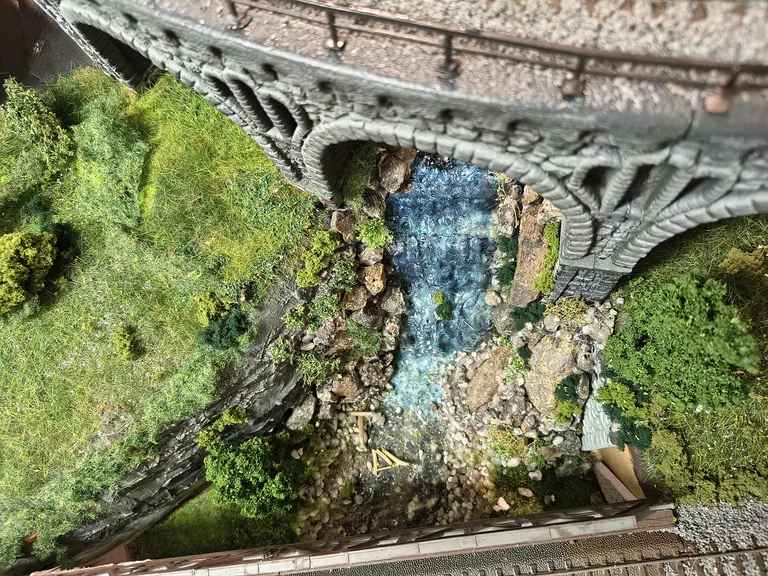
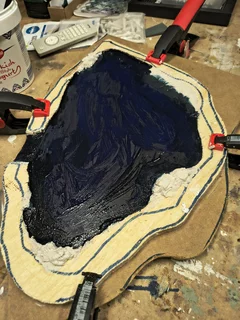
Just as a church belongs to a village, a waterfall belongs to a model railway. On my new layout “Falkenstein,” it takes its place on level 2: a small, deep lake spills over a steep, multi-tiered cascade into a narrow riverbed. The result is not only a lively scene but also a natural visual separation of the different sections of the layout within the limited space.
The construction was carried out with standard materials from the model railway accessory industry. The lake was created with a slowly hardening pouring compound, tinted deep blue-black to suggest depth. The outflow and the waterfall itself were formed with a faster-hardening water gel, shaped into flowing strands with whitish swirls added during curing to create the impression of turbulence and spray. At the foot of the fall, the water splashes into a small stream that meanders along a rocky bank, creating small eddies, before flowing beneath the bridge of the double-track parade line.
The key element is the coloring of the base: better more black than blue—it looks more realistic. Even fine-grained, light-colored sand can enhance the illusion of depth before applying the gel-like “water mass.”
And once the surrounding “untidy” landscape is added—with roots, tree trunks, driftwood, and a varied vegetation in many shades of green—you might almost feel like taking off your clothes and jumping in for a refreshing swim. Let’s go!
What would a model railway be without a small lake? Exactly: rather dull. The future residents of my layout will also want to take walks, swim, go fishing, and enjoy nature. To provide them with this retreat, I crafted a lake: two plywood sheets, the upper one cut to match the shoreline. After painting it in dark tones and sealing it with waterproof yacht varnish, I poured in a slow-curing water effect. Several days later, it had fully hardened – and now only the lively presence of tiny figures by the water’s edge is missing.
Anyone building a permanent layout will notice sooner or later: Märklin’s C-track is excellent in design and function, but its plain grey base can look a bit artificial in a realistic landscape. Just like the real thing, tracks need solid support in a gravel bed.
Following G. Meise’s helpful YouTube tutorials, I started ballasting – first testing on spare track pieces to get a feel for tools, glue, and ballast density. The work takes time, but the result is worth it: the fine-grained, color-matched ballast transforms the whole look.
Afterwards, I carefully remove stray stones with tweezers and a small spatula, polish the rails with a cleaning wagon and a “rubber”. Turnouts require special care – I ballast around them by hand, keeping moving parts clear. If necessary, the glued track can still be lifted later using a Dremel tool.
Conclusion: Ballasting takes patience, but it brings the layout to life – adding texture, realism, and atmosphere.